Maybe some day restore a '79 - now named "Freedom"

Classic Goldwings

Help Support Classic Goldwings:

This site may earn a commission from merchant affiliate links, including eBay, Amazon, and others.
Rear caliper off and disassembled. Rear MC off and disassembly started - waiting for a kit to do more. Pistons came out easy and look reusable.

Daubed some liquid electrical tape on a bunch of Scotch-lok wounds and reconnected a headlight wire that had probably been cut for the Vetter install.
 
saganaga":bfjfen7r said:
[url=https://classicgoldwings.com/forum/viewtopic.php?p=211622#p211622:bfjfen7r said:
pidjones » Today, 8:59 am[/url]":bfjfen7r]
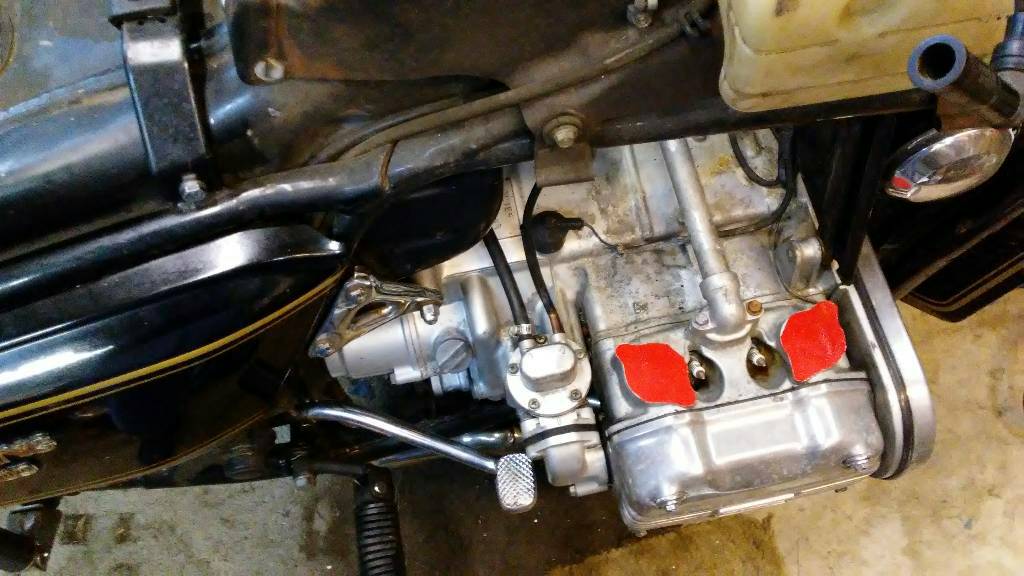
She runs! Not great, and POURS fuel out of the carbs, but started without choke. (Choke is frozen - probably the cable.)

One possible cheap fix for a frozen choke cable is removing the cable completely, hanging it vertically, and spraying the cable (using the straw) with PB Blaster.

Let it sit for awhile, then work the cable back and forth in the housing. Once it is moving smoothly, hang it vertically again and dribble down some light engine oil.

Or you could just replace the cable and housing. Probably easier and cheaper to buy a replacement cable made for the motorcycle, but you can always make your own if you can't find it. Had to do that for my Honda scooter. Bought a longer generic cable, cut off an end, pulled the cable out, cut the housing to length, filed the end of the housing, put on a ferrule (IIRC, same size as a bicycle brake cable ferrule, YMMV), got one of the soldered-on knarps and put it on.

Choke cable was dry. It is hanging with lube running down through it now. BTW, I have a cable oiler, and that helps force lube down the sheath.

Carbs are off and stored in a box until I can get to them and have my large US cleaner fixed.
a451ef5c8b2e5e53c0edc336698def4f.jpg

cdd7a2ac43989bc3cf00ac4c68e379a1.jpg
 
Wife and daughter decided that since I was discharged from the USN in '79 to begin my next career, the bike should be called "Freedom" - so be it.

I pulled #2&4 off and removed everything for the ultrasonic. My big one that will take two bodies at once is dead, so the small parts from two carbs are in trays in the Harbor Freight cleaner. Guess the bodies will just get brake cleaner and 100 psi air. Not that bad inside, but outside the were pretty caked with road grime. So, I reassembled the piston caps and float bowls to them and put the rack back together. They I put them outside on the drive and gave them a heavy bath of "Scrubbin' Bubbles (Dow bathroom cleaner)" and let it set for about ten minutes while I hooked up the pressure washer. Pressure washed them off real good, then dried with a leaf blower. MUCH nicer to work on now! Since this bike is primarily for go rather than show, I won't be polishing as much as I did on the Hunley. The piston caps are easy and add a nice glow, however.
DSC07750.JPG
DSC07760.JPG
DSC07763.JPG


A few PO issues, but I have Helcoil kits for these bad boys from the Hunley build. Just have to find them.... Think the carbs have been leaking for a while?
DSC07738.JPG
 
Finished carb clean, rebuild, PO repair (hopefully fixed more than I broke) of wrong jets, missing float valve filters, stripped threads, wallowed JIS heads, shuffled float bowls. Leak tested with isopropyl, fixed the one leaky float seat (just needed a polish), let it set 24 hours and leak-free. Drained and awaiting some pretty-work on the intake runners. Rear bake rebuild kits are in and I'll start that next. Seriously considering reassembly after brakes are sorted to use it for a daily driver while weather is good. This would point out any problems that need addressed when weather turns cold (and the 1800 returns to DD duty).
 
Did a light polish on the intake runners. Takes so little time and really looks nice. Took longer to remove the gook that a PO had put on the o-rings, really. Looked like both silicone seal and something that hardened up. Intake runners on 1 and 3 are turned up so that the rack will slide in easy.

Finished cleaning the rear caliper and lubed it all up with DOT 3, assembled, and installed. Rebuild kit for MC and caliper from George Fix on ebay. Here is a hint for doing the rear caliper. If you want to put the bike back on it wheels and not have the rear wheel sliding around, cut a piece of plastic (or other material) conduit to replace the rear caliper as a spacer.

Boiled the carb bodies because the big US cleaner bit the big one.
DSC07785.JPG
DSC07787.JPG
DSC07788.JPG
DSC07776.JPG
 
PurpleGL1200I":3ntbjb0e said:
suggest saving the rod bearings (if usable) because they are not available.

Oh, I saved the rods and pistons, rod bearings, mains, heads because bearing surfaces were still protected by oil film in the tight areas. Open areas like cam lobes and transmission gears had the oil off of the steel, and were rusted. Saved the crank, also. But that was the junker and I have since stripped it and given the blick and gears to a friend that sells the metal. There was very little of the carbs on it reusabke because of corrosion. The brass was Ok, but the bodies very bad. I still have the frame, but plan to pull the removable section and scrap the rest.

The project '79 however - might be rideable in a couple weeks!
 
The carbs are now clean and reassembled. Had to correct some PO issues: wrong jets in a couple places, stripped bowl threads, shuffled float bowls, missing float valve filters, springs hooked wrong or not hooked, missing choke spring boots, doubled o-rings in the plenum split gasket with the inner ones sucked in. My large US cleaner died so I boiled the carbs. Worked Ok, but I prefer US cleaner. Took a whole hour with four burners going for the grill to get the two pans of water up to a boil and bring it back up after putting the carbs in (with the lid closed). Put HeliCoils in the stripped float bowl threads and replaced all float bowl and vaccum dome screws with new JIS screws from Ace hardware. The old ones were wallowed out, probably from a PO using non-JIS screwdriver. --- Folks, you can get good Motion Pro JIS 1/4" hex drive bits on Amazon cheap!! Do it and quit ruining your Japanese bike screws!

7bfbebaa4e0002f288f846b532d9c2c9.jpg
0c3c95d3e28fb8e9ebfe13bdc2f243a4.jpg
 
joedrum":18logb70 said:
Ok I’m slow explain rear brake mod ...I’m not understanding it but want to
No mod, Joe - just clean and rebuild. Which is now done! Surprisingly easy to bleed this time, too. Now to swap sides with the front calipers. A PO put them on the wrong sides so the bleeders are pointing down!

Now, I do plan an ignition mod for it. I want to add Ford TFI modules triggered by the points. This should reduce point current to micro amperes and let them last for tens of thousands of miles, only requiring adjustment for cam rider wear. Another advantage is that with a couple quick-connect changes, you're back to standard points ignition (leave the condensers mounted in case).
 
No mod, Joe - just clean and rebuild. Which is now done! Surprisingly easy to bleed this time, too. Now to swap sides with the front calipers. A PO put them on the wrong sides so the bleeders are pointing down!

I see that on the rare occasion with cars, which can still be stopped, even with trapped air and a low pedal, but a bike? Wow.
 
After even the limited number of "pre-enjoyed" motorcycles I've owned, it is no longer surprising to find any number of crazy PO issues. Internal circlips in external grooves, grease seal removed and entire swing arm pumped full of grease, triple tree clamps spred to accept 2 mm larger forks with a leading axle that produced such small trail that a steering stabilizer was added, 3 pounds of Bondo packed under tail fairing to replace busted plastic, zip tie used to replace shelter hinge pin. Extensive use of Scotch-loks. And the biggest one on the Hunley - an engine that looks to have been half-submerged for extended time. 8I just fix and continue. I guess these brakes could have been bled with calipers unbolted, rotated, and something placed between the pads. They bled pretty easy after swapping sides (and drilling a solid plug of crud out of one bleeder screw).
 
[url=https://classicgoldwings.com/forum/viewtopic.php?p=212034#p212034:26w4laxw said:
pidjones » 20 Aug 2019, 07:06[/url]":26w4laxw]
I guess these brakes could have been bled with calipers unbolted, rotated, and something placed between the pads. They bled pretty easy after swapping sides (and drilling a solid plug of crud out of one bleeder screw).

I was going to say that very thing, but I thought I would be insane to even mention it, lol! Like you, I have seen people "accomplish" some pretty weird things in my time!
 
Today I patched the wiring to the original tail light and rear signals. They had been butchered for the "cafe" version it went through. Mounted the carbs back on. Waiting for points to get in to try it. It had a Dyna S setup on it when acquired, but want to get it running on points and then add Ford TFI modules. At least they left the condenser. I had a cam and backing plate from the junker engine as well as stock ballast resistor, so all I needed was poinrs and wires. Stripped some wires from the junker harness for that as well as the rear lighting, so I even have the correct colors. Wish I had the headlight ears with turn signal mounts still there. Looks like everyone that put on Vetters butchered the turn signal mounts on the ears.
 
[url=https://www.classicgoldwings.com/forum/viewtopic.php?p=212068#p212068:1cyyiaj6 said:
Two85s » Wed Aug 21, 2019 12:41 pm[/url]":1cyyiaj6]
I have all the headlight and turn signals parts from a 77 if they are the same.
Thanks for the offer, but in '79 they changed the turn signals and the way they mount. And when Vetters are installed people hacksaw off the ears that the signals mount to.
 
Drove 100 miles for a memorial service of a lady that was our doctor's wife and mother of two girls around my age. Also picked up a trunk that had been my dad's that a cousin had been keeping for us. When I got home, checked why the throttle seemed to be sticking and discovered the push cable broken, so that is ordered. I think tomorrow I will move the bike out more into the center of the garage with more room around it and tackle the headlight bucket wiring and at least temporary mounting of some temporary front turn signals. Then I need to mount the mufflers. Points should be in Friday. I can static time it while waiting for the cable which should be here Monday.
 
SHAZBOT!! Got the mufflers all ready to mount up, slung them under the bike, and they are about 1 - 2" too long! These headers are aftermarket - nice looking chrome (a little blued) but, too long. Considering maybe swapping them with the OEM headers on the Hunley as those have aftermarket Emgo slash-cut shorties for mufflers mounted. There's a guy on NGW offering a set of OEMs fir $100 plus ship, but I'd rather swap and save the cash for other things.

So.... it won't get on the street for a while because I'm still showing the Hunley and don't think I'll have time to swap for a while. I'll pull these headers, polish and maybe paint (Hunley's don't have any chrome shields, they were just SS that I first polished and then painted black).

Oh well, the push cable came in so I can get that on and finish the carb setup. I had pulled the rear wheel to permit muffler install, so I guess that will have to go back on so things can be moved around in this small garage (the 1800 lives in there as well as the washer, dryer, deep sink, and furnace).
 
Pulled the headers off of the '79 today. Also replaced the removable frame section (rusted through) with one from the junker (solid). Polished one of the headers and I don't think they need painted. The SS blueing went away and it polished up real nice.
7059bff8fd6491a08413c64deac06257.jpg
 

Latest posts

Top