about to mount first try at single carb setup

Classic Goldwings

Help Support Classic Goldwings:

This site may earn a commission from merchant affiliate links, including eBay, Amazon, and others.
Sounds great.

A little bit I learned from trial and error about that 'bump' when the secondary opens is that it doesn't have to be (shouldn't be) there. Mine was harsh enough to break the clutch loose when it kick it at high rpm.
After tweaking the primary jetting I have a seamless transition into secondary under every rpm and load.
For the most part it was a bit to lean in the primary causing it.
 
yes its getting better ... iagree with dan but on the flip side of that thinking is ...at first cracking of secondary is again the idle jet for the secondary ..and it could smooth out secondary by increasing that jet maybe also ....

but like you id give it a few rides to really get a good grasp on whats going on

im glad your project is coming out so good ... great job
 
Well went for a 50+ mile ride today Low 60's here in so. cal.
Went on freeway , some twisty roads and cruised stop and go on coast hwy
In oceanside. Stopped once for coffee. :beer: no, really coffee.
The flat spot I thought I felt at 4000 to 5000 rpm did not seem as much today mostly just different from my stock setup.
If I was looking for negative aspect, the only thing I noticed is I could not engage clutch at 1000 rpm and idle out from complete stop.
When my stock setup was working properly I could engage clutch at 1000 rpm and creep out smoothly without throttle on flat ground, like a big rig in low.
With my current setup I do have to slightly rev engine and also slightly slip clutch to engage at 1500 to just under 2000 rpm.
To me this is no big deal and I think a lot of guys have to do that with their stock carb setup. So I'm going to put more miles on it but may look into a pvc choke at vw side of runners sometime to see what that changes. ( Joe I think I asked you before but don't remember, How did you attach your choke pieces so that they would not come loose from plenum?) Other than that it was all good and idled smooth after pulling to stop at end of offramp and all other stop and starts as well. Most definitely between 3000 and 5000 rpm its way smoother and more powerful than my stock setup ever was and I've had this bike for more than 30 years (although it sat for a long time unused). This really makes the around town riding a blast as I used to get a little herky jerky thing in first on tight corners in neighborhood riding. So I'll keep riding and see what else comes up to deal with.
Oh, does not seem to HAVE to have heat right now to run well enough so I'm not going to do anything about that right now but I'm sure following all the heat related threads so I know what I'll have to do when the time comes. :heat:
Dave
 
[url=https://www.classicgoldwings.com/forum/viewtopic.php?p=110530#p110530:dgbqn8dl said:
who444444 » Tue Feb 18, 2014 6:46 pm[/url]":dgbqn8dl]
Well went for a 50+ mile ride today Low 60's here in so. cal.
Went on freeway , some twisty roads and cruised stop and go on coast hwy
In oceanside. Stopped once for coffee. :beer: no, really coffee.
The flat spot I thought I felt at 4000 to 5000 rpm did not seem as much today mostly just different from my stock setup.
If I was looking for negative aspect, the only thing I noticed is I could not engage clutch at 1000 rpm and idle out from complete stop.
When my stock setup was working properly I could engage clutch at 1000 rpm and creep out smoothly without throttle on flat ground, like a big rig in low.
With my current setup I do have to slightly rev engine and also slightly slip clutch to engage at 1500 to just under 2000 rpm.
To me this is no big deal and I think a lot of guys have to do that with their stock carb setup. So I'm going to put more miles on it but may look into a pvc choke at vw side of runners sometime to see what that changes. ( Joe I think I asked you before but don't remember, How did you attach your choke pieces so that they would not come loose from plenum?) Other than that it was all good and idled smooth after pulling to stop at end of offramp and all other stop and starts as well. Most definitely between 3000 and 5000 rpm its way smoother and more powerful than my stock setup ever was and I've had this bike for more than 30 years (although it sat for a long time unused). This really makes the around town riding a blast as I used to get a little herky jerky thing in first on tight corners in neighborhood riding. So I'll keep riding and see what else comes up to deal with.
Oh, does not seem to HAVE to have heat right now to run well enough so I'm not going to do anything about that right now but I'm sure following all the heat related threads so I know what I'll have to do when the time comes. :heat:
Dave

>If I was looking for negative aspect, the only thing I noticed is I could not engage clutch at 1000 rpm and idle out from complete stop.
>When my stock setup was working properly I could engage clutch at 1000 rpm and creep out smoothly without throttle on flat ground, like a big rig in low.
>With my current setup I do have to slightly rev engine and also slightly slip clutch to engage at 1500 to just under 2000 rpm.

Wow! That's what I felt exactly.
If I engage the clutch @ too low rev, it bogs a little bit.

> Most definitely between 3000 and 5000 rpm its way smoother and more powerful than my stock setup

That's what I felt too. I am not sure powerful but definitely smoother.

> Oh, does not seem to HAVE to have heat right now to run well enough

Probably true to mine too. It held on to around 70F with the heater turned off as far as I don't open up the throttle a lot.
Also in my case, the steel pipe runners were really warm almost hot I can say. I don't think the heat is coming from my plenum heater. It must be coming from the heads via factory elbow connecting pieces. And maybe radiating heat from the crankcase also heats up the plenum and runners to some extent.
 
Well that flat spot just off idle bugged me too much as I don't like having to slip the clutch to take off so....
I already had bought the glacier bay grab bars from home depot per canukxxxx setup and probably someone else's also, ( really a lot of threads to sort through ).
So I decided to make up another set of runners combining more than one idea. I had an extra set of stock honda intake elbows so I cut them just above the bolt ears and mated them to the grab bars.
I'm doing one at a time so I can make them up to an already mounted intake. This will ensure an exact fit from head to vw plenum.
The main difference from my first setup is I'm going to insert 1 inch schedule 40 electrical pvc conduit inside the grab bar from vw outlet to just before 90 of grab bar.
This will make it like dan's 1 inch runners and also will allow me to easily remove the pvc to check other options. I left ears on grab bar flange and used quicksteel to seal grab bar to honda flange.
A little heat on the pvc allowed me to insert the pvc into vw plenum and also allowed me to flair the other end for smooth transition to grab bar before 90. I also beveled the pvc to paper thin at ends so there won't be a lip for fuel mix to hit.We will see if this setup gets rid of flat spot off of idle. I'm kinda doing one runner a day so it might be a little while before I check in with an update.
So a little bit of joe's choke and a little bit of dan's 1 inch runners and canuckxxxx grab bar and mix it all together. I hope this makes a little sense as when I read it back to myself it seems confusing.
Just have one runner done so far and following are 2 pics showing what I'm rambling about.
pic is of the runner that has the offset. 1 more like that and 2 that are straight shots, but this does get rid of the s bend in the other setup. Still no welding involved and anyone can do this. We will see if it works better or not.
dave
 

Attachments

  • pic1 small.jpg
    pic1 small.jpg
    20.3 KB · Views: 145
  • pic2 small.jpg
    pic2 small.jpg
    44.3 KB · Views: 143
So the PVC stops at the 90? That should work just fine. You should get better low end power that way yet retain a very good top end. :clapping:
 
hmmm this is pretty much where I am heading ...with mine ...just have to purchase grab bars....well this shows the adjustability of the choking that can happen ....id say running the choke to the elbows may be great move ....or anywhere from back to type to type4 outlet....should have a varying effect depending where the length of choke stops ....

I certainly like the grab bars approach ....seems like my chokes come out about 1" maybe a bit more from type4 outlet ... I call this approach a totally adjustable manifold ..with the work ive done in dust collection on industrial wood working machines I can tell you there is increased suction going on here ... I am not going to get into a debate about something I know for a fact ... but I will say this the field is wide open to improvement ....
 
Great timing! I am also trying Dan's 1" runner theme. :hihihi:
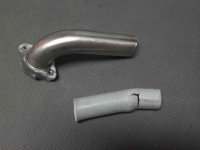
Here are my choke pieces.
DSCN0262s.jpg

1.5" ID to 1" ID in 1" length.
I can place them right at the end of the runner or somewhere in the middle followed by 1" ID DOM tubing.
Should I have some length (a few inches?) of 1" ID passage or just the transition will be enough?

Back to the topic, I finally caught up with most of the single carb threads and Dan stresses the importance of plenum heat for getting rid of low end bogging. Maybe you need a heat after all? My low end bog was not that severe and I now remember it occurred with stock 4 carbs also. Maybe mine is more like clutch issue.

I added one more resister to the plenum. My next test ride will be this weekend.
 
length would effect things ... as my chokes go as they are now they are hour glass shape except with strat lines as opposed to curve lines of hour glass ...I see no problem in no length ...adding length will diffinitly get to a point of diminishing return ... if you think opening backup runners as do is asset ...I have quite the practical experience with industrial wood chip removal .. witch is closely related to the principals of getting the best charge with the least amount of effort applied ...
 
I am not in the process of building any single carb setup at the moment, but have been reading everything as it gets posted.

As I read the posts about the "choke" I think the term is incorrect and may be misleading. What is being installed are reducers inside the runners creating a venturi effect. I would suggest that we make sure we are clear about what is being installed since a "choke" is commonly installed at the throat of the carb.
 
[url=https://www.classicgoldwings.com/forum/viewtopic.php?p=110657#p110657:1lbijxv6 said:
mcgovern61 » Fri Feb 21, 2014 9:13 am[/url]":1lbijxv6]
I am not in the process of building any single carb setup at the moment, but have been reading everything as it gets posted.

As I read the posts about the "choke" I think the term is incorrect and may be misleading. What is being installed are reducers inside the runners creating a venturi effect. I would suggest that we make sure we are clear about what is being installed since a "choke" is commonly installed at the throat of the carb.
+1 the reduced ID speeds the flow giving you stronger fuel charge. Too small though will limit top rpm power. It seems to me 1" ID is about perfect for our motors. :thanks:
 
Got one more runner done today but won't get back to it till tuesday to do the other two. And we might actually get a storm here in so cal next week
possibly delaying me even more.
I certainly don't have a strong opinion if this is going to be better or not, just thinking about trying two different approaches.
the first was inch and a quarter pretty much the whole way and this is going to be 1 inch most of the way till just before 90.
Will give me a good idea of the difference it may make, more than just reading about other setups.
Oh and the reason I used the stock flanges under the grab bars was simply because they came out to the same height as my first setup
allowing me to do one runner at a time and have the other three runners keeping everything in proper alignment. this is making it much easier
to fabricate without as many mistakes. Got lucky on that. :yahoo:
dave
 
finished making the other two runners and everything is ready for test ride tomorrow.
The two runners I thought were going to be a straight shot were actually offset just not nearly as much as the other two.
I think it does look like backyard manufacturing and it is.
I will post a after ride report, I hope also tomorrow.
here are 2 pics 1 from each side.
dave
 

Attachments

  • lside.jpg
    lside.jpg
    25.8 KB · Views: 163
  • rside.jpg
    rside.jpg
    27.2 KB · Views: 162
Top