Dan's Honda CBR coil install

Classic Goldwings

Help Support Classic Goldwings:

This site may earn a commission from merchant affiliate links, including eBay, Amazon, and others.

dan filipi

Well-known member
Staff member
Administrator
Moderator
Supporting Member
Joined
Dec 3, 2009
Messages
22,403
Reaction score
238
Location
Van Nuys Ca.
My Bike Models
1983 Interstate
2018 KLR 650
2018 BMW S1000 RR
My Bike Logs forum link
https://classicgoldwings.com/forums/dan-filipi.122/
This is a thread detailing my installation of Honda CBR MP08 coils in my 83 GL1100 Innerstate.

A side by side shot, stock set on the left, CBR coil on the right:

image.php


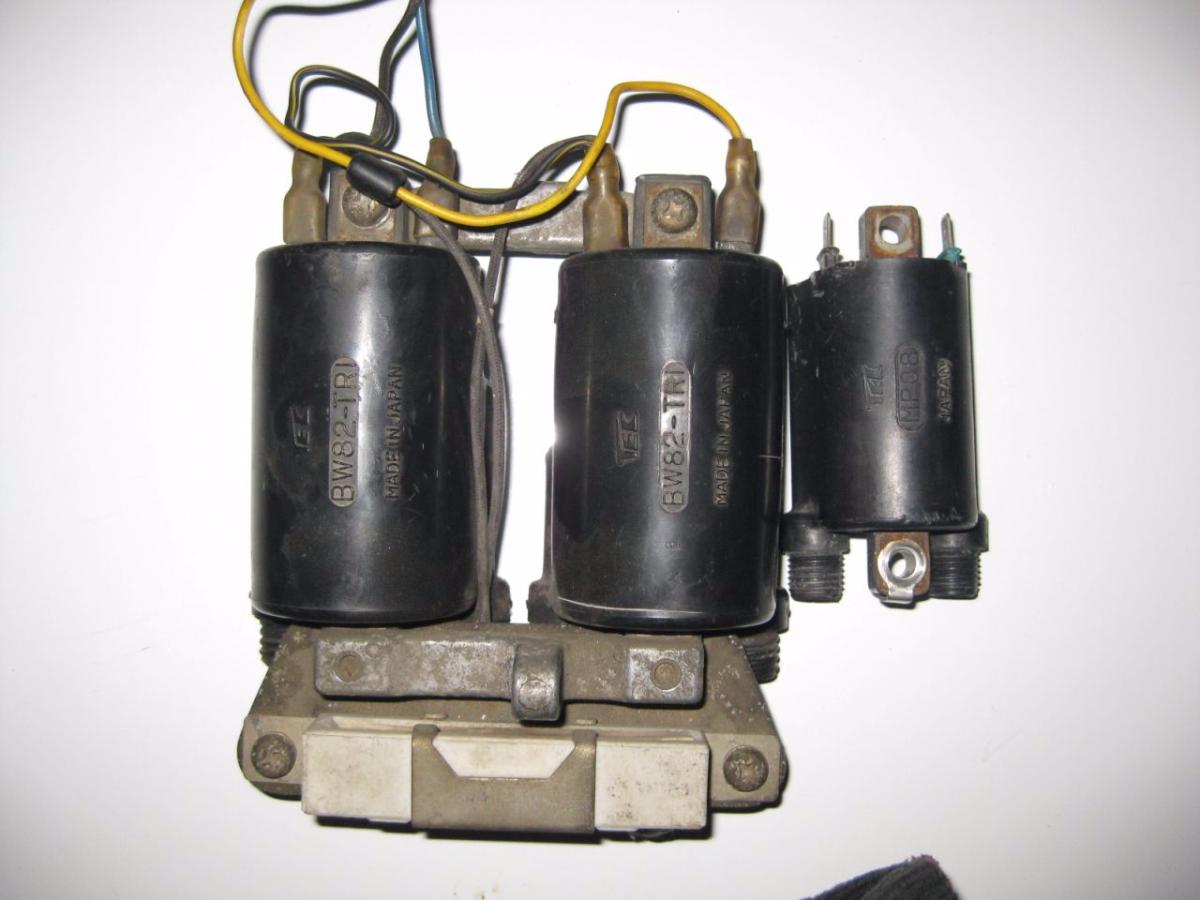
I'm going to run the CBR coils without a resistor so there's no need to reuse the resistor mount flat bracket, only the 2 heavy aluminum end brackets.

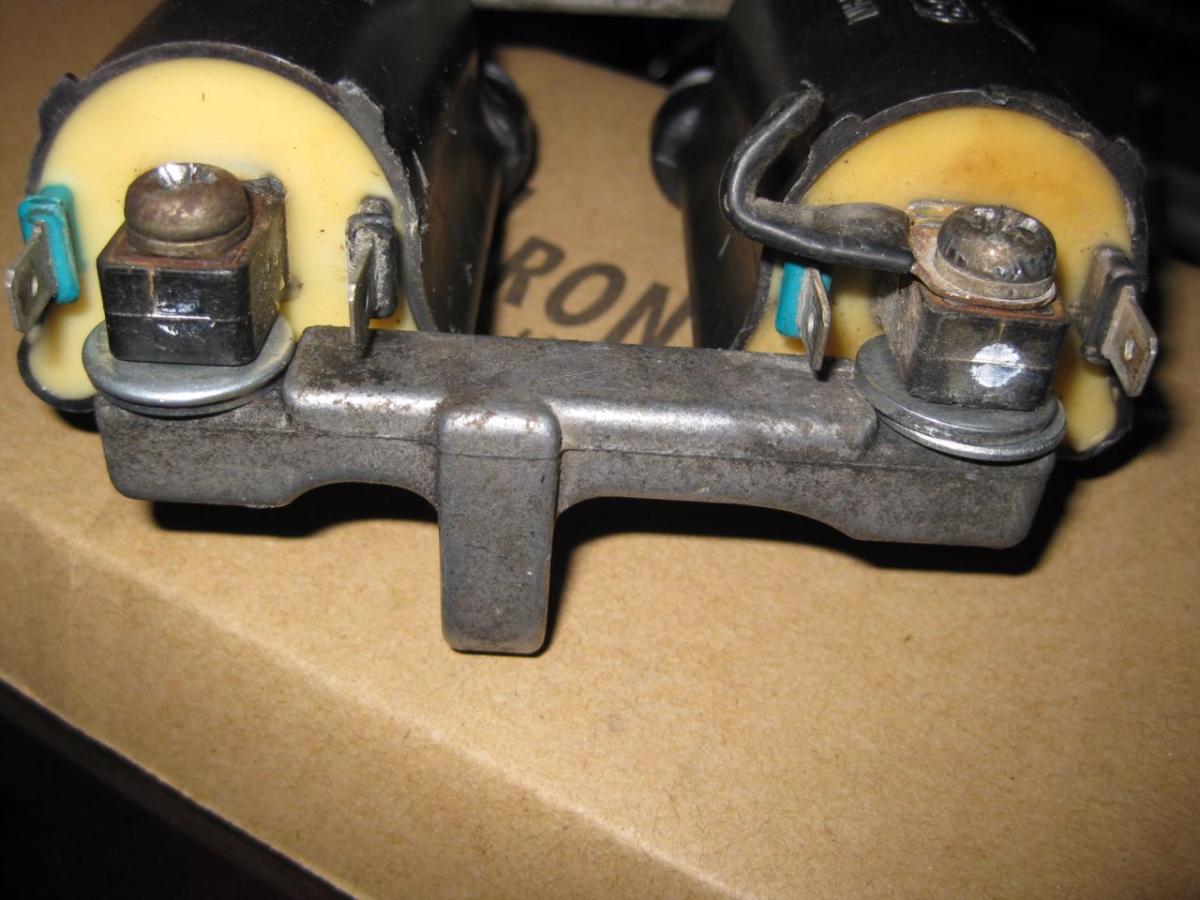
Remove the stock coils from the aluminum mounts and screw on the CBR coils in place.
I had to space the coils out with 2 washers so the primary posts would clear:

image.php


image.php


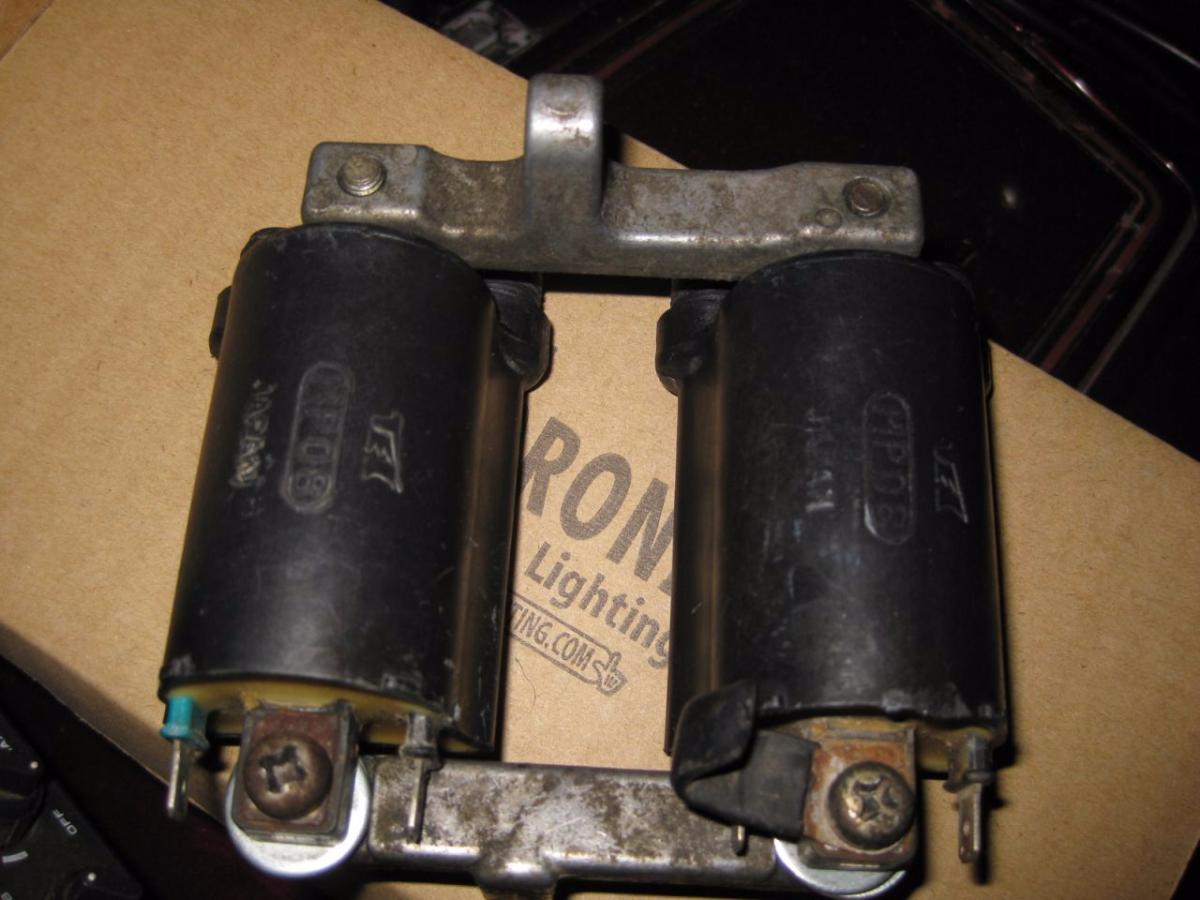
The front mount will bolt right on the frame no problem but since the CBR coils are almost 2" shorter I had to make an extension bracket:

image.php


image.php


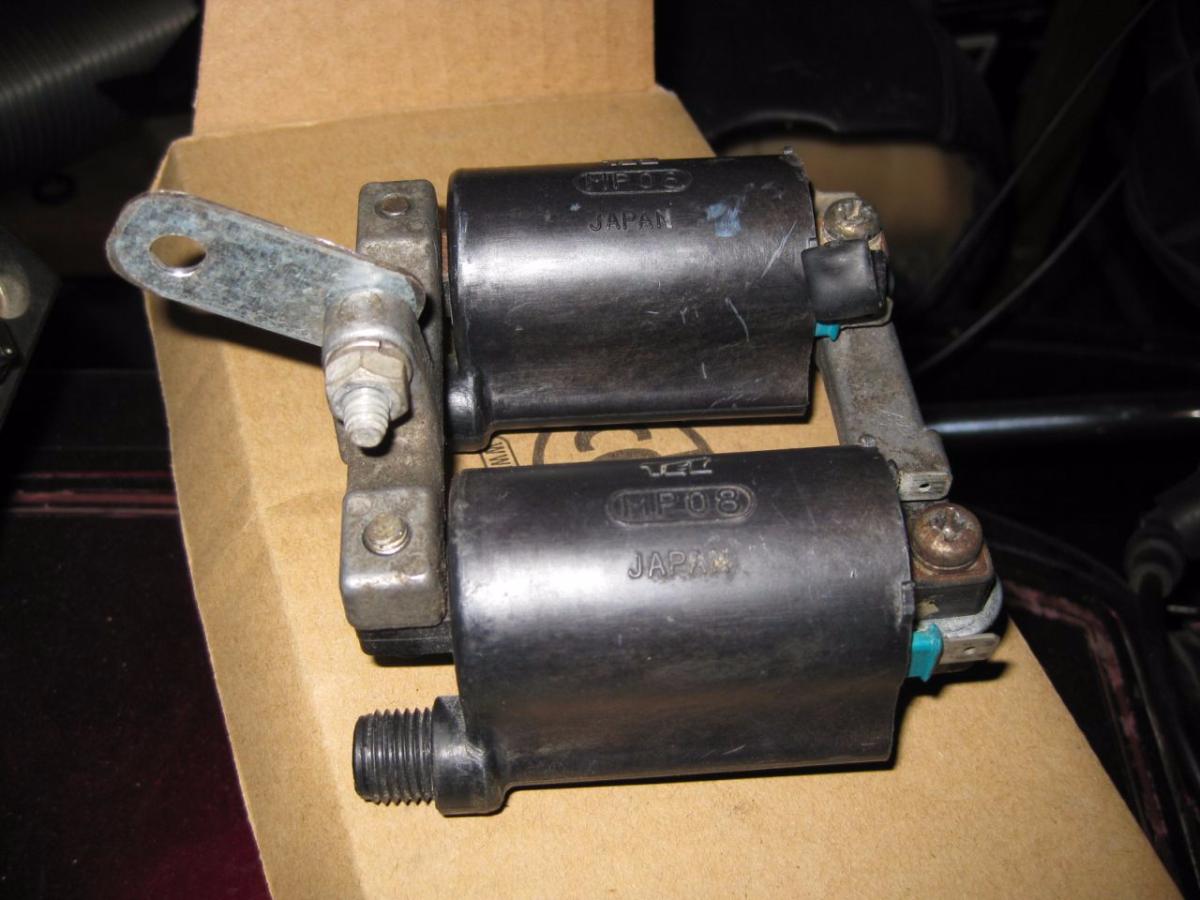
And there we have it:
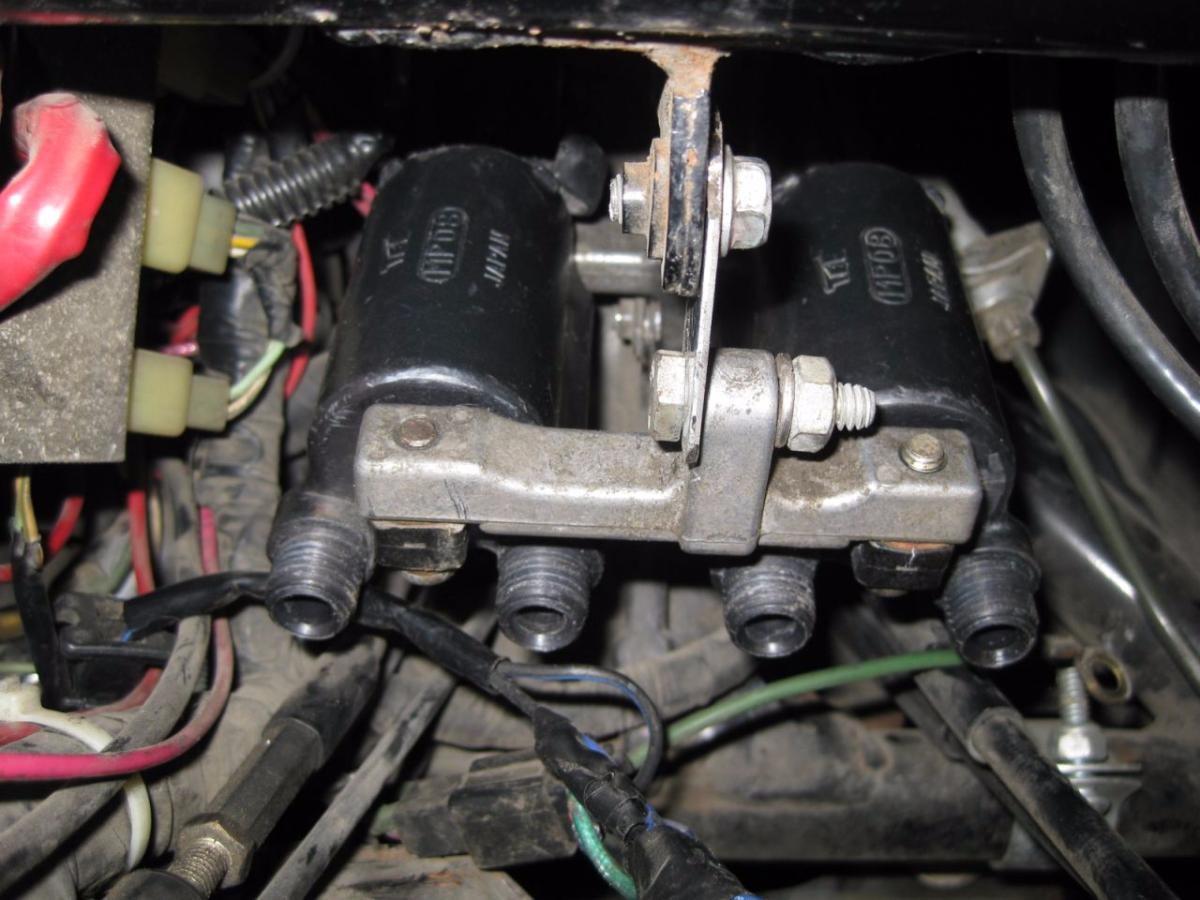
image.php


All pretty simple.
I had more trouble getting the old coil mount screws loose than anything.
Soak them and the visible threads for awhile before hand.

I'll post the hookups of primary and plug wires, there are some differences but not any problem.
 
I cut the black (ground) wire leading to the resistor then soldered the wires together so there's a direct un-ballasted 12 volts to the coils:

image.php


image.php


The CBR Cap, Washer, and O ring seal are all smaller than those used on the stock coils:
(GL on the left, CBR on the right)
image.php


........so all 3 pieces have to be put on the old GL wires after taking the GL caps, washers, and seals off.
I found it easier to cut the CBR wire off at the back side of the cap. This made the washer and O-ring easier to get off the old wire because at the right side of the cap the wire has been compressed for who knows how long which leaves a swell in the wire which is hard to get the seal past:

image.php


image.php


I cut the 1100 wire off just past the old compressed part of the wire. This made getting the washer and O-ring easier to install on the wire.

Prepped and ready to install:

image.php


I prepped everything off the bike but it's necessary to unscrew the plug wires from the coils to pass the wires in between the carbs and frame.

Don't forget the green ground wire goes on the front coil mount to the frame:

image.php


Bolted up tight and ready to fire up:

image.php


It's a bit hard to tell in the video but in real life the acceleration is pretty quick and it's running fairly smooth. Hard to tell the actual improvement from the stock coils, test ride is needed.

This has actually been a fairly simple mod.

I would recommend getting new plug wires and the little rubber Orings that go on the wires in the cap if the ones you get with the coils are old. The rubber likes to stick on the wire like it's melted on. I had to tear 2 of them off the wire.
 
Following in Dan's footsteps...

DSC_0027.JPG


I removed the ballast resistor and soldered/heat shrinked the wire. I'm getting ready to make the "Dan Filipi coil bracket" and then I'll be ready to build the new wires. Thanks for leading the way, Dan! :clapping:
 
Oh I'm not sure if it matters but I have the primary coil polarity reverse of your's,
yellow and blue on the blue post. I think that's the polarity my 1100 coils were also but that doesn't mean mine were right.
 
Great job,

Hey Dan,

For the Video had you already done the relay mod. or was that done later.

Sure sound's good, and started fast.

I would like to do both mods to my 83' GL11-I
 
No I haven't done the relay mod, I don't see it would give any improvement. On my bike anyway.
Because I checked voltage at the coil and at the battery, just a .1 volt difference.
 
Dan the relay for the ignition circuit will help with future wear and tear on you ignition switch. Your are correct in saying that your current voltage drop is insignificant, but you don't know that it is always constant at the tested level. That said I am very impressed with the quality of old Honda electrics and their longevity. A mate had the ignition switch fail on his Triumph Rocket at less than 15k (still under warranty) leaving him stranded on the freeway :swoon: :beg: :Awe:
 
Ansimp":3uja9isu said:
Dan the relay for the ignition circuit will help with future wear and tear on you ignition switch. Your are correct in saying that your current voltage drop is insignificant, but you don't know that it is always constant at the tested level. That said I am very impressed with the quality of old Honda electrics and their longevity. A mate had the ignition switch fail on his Triumph Rocket at less than 15k (still under warranty) leaving him stranded on the freeway :swoon: :beg: :Awe:
I've already put a relay on the main power feed after the ignition switch, which also powers the fuse panel but putting a relay on the coils could help in the circuit running through the kill switch and start button I suppose.
 
That explains your minor voltage drop which should be fairly constant as you removed the load from the ignition switch :good:
 
Hey Dan,

That also sounds like a great idea

Do you have a drawing or link to the relay on the main power feed
 
westgl":1z6bmx49 said:
Hey Dan,

That also sounds like a great idea

Do you have a drawing or link to the relay on the main power feed

I don't think I documented the mod back then but it's pretty simple really.
Just need to intercept the black wire from the ign switch and put a relay inline.
At the same time, I replaced the glass fuse panel with a blade fuse type.

I don't know if this diagram has been posted yet in this thread but here it is again:

Description: This is not totally accurate because the coil resistor is NOT displayed but it gives a good idea of how to connect the relay in the coil circuit HOT supply to the coils.
image.php
 
I have GL1500/CBR coils, Model# MP08 coils, are on their way.

For my 83' GL1100.

I would like to do the relay mod at the same time.

Where, what have you guys put a relay on to reduce load, and what were the benefits?

I may also do a conversion to a Blade fuse panel at the same time, I need to locate a fuse block with the correct number of fuses maybe a couple more for add ons.

Now if i do a single relay before the fuse panel it should protect everything going through the fuse panel, correct.

Then do other relays for other electrical parts.

Or should I have a relay for each individual electrical Part. Like Headlight/lighting, Horns, etc..
 
I was looking online and saw a company had a circuit breaker panel, that might be nice, they were small like a relay, but soon as you power down they reset, and they do not have a cycle life rating like a relay.

I used a circuit breaker on the poorboy conversion that i had done, it worked fine, but did not have it on for a long period of time. So no duration test.

But a relay would be fine and probably last longer than i need them to
 
Well I put a relay in the line from the ignition switch that powers the fuse block.
When I check voltage at the coils compared to the battery voltage, there is only a .1 volt difference so I don't see a reason for the coil relay mod. On my bike anyway.
Power for the coils is still going through the kill switch so I suppose there might be some slight benefit to a relay for some but I'm not going to add another part of potential failure on mine.

After adding the fuse block relay my lights got noticeably brighter.
What prompted me in the first place to do this was I read so many guys with problems after the ignition switch, traced back to a corroded contact in the switch and sometimes overheated.
That and I replaced the fuse block with blade fuses because the glass fuses were getting hot from loose connections.

After doing these mods I see no reason to add more parts that could fail (relays) in the lighting circuits.
 

Latest posts

Top