You are using an out of date browser. It may not display this or other websites correctly.
You should upgrade or use an alternative browser.
You should upgrade or use an alternative browser.
Single Carb Conversion: Adapt the stock plenum
- Thread starter westgl
- Start date


Help Support Classic Goldwings:
This site may earn a commission from merchant affiliate
links, including eBay, Amazon, and others.
badorderbob
Well-known member
Gentlemen please listen up,... IF you use the tap up by the thermostat, you will NOT(get an even flow of HEAT) or any heat at all!! Please don't use that set up ( my first attempt to heat but you may use the tap on the back of the cross over main tube only!! And you need to tap for another outlet down by the water pump which WILLgive you much better flow and Heat!!! This way gives enough heat!!! Ask me how I know !!!! Hope I caught this in time!!! :rocks: Bob[url=https://www.classicgoldwings.com/forum/viewtopic.php?p=97392#p97392:1vgjgshj said:westgl » Tue Sep 24, 2013 9:50 am[/url]":1vgjgshj]
I see there is a Vaccum port, that runs from one side of the Plenum to the other side.
That Vacuum port goes across the plenum width centered, that raised section in the plenum floor.
Drill & Tap that Vacuum port hole on each side of the plenum, and there is your Heated Plenum.
Drill & Tap the water line at the Fitting for the water tubes on top of the engine to provide heated water to the plenum.

Plenum Coolant Heat using a Ball valve shut off
Plenum Coolant Heat using a Ball valve shut off

Plenum Heat using Coolant from Water Tube adding Fittings
Plenum Heat using Coolant from Water Tube adding Fittings

we have been talking a lot of raising the floor ...one thing for sure ,,,that space could circulate water for heating manifold ...not sure how or even thinking about it ...right now
Thank you Bob.
I did see your post tapping into coolant down by the water pump.
I have not started on adding heat yet, I will have to review that.
Thanks for your help.
Were you able to get your 32DFT carb. mounted and running yet?
I did see your post tapping into coolant down by the water pump.
I have not started on adding heat yet, I will have to review that.
Thanks for your help.
Were you able to get your 32DFT carb. mounted and running yet?
[url=https://www.classicgoldwings.com/forum/viewtopic.php?p=97556#p97556:vct5co0u said:badorderbob » Wed Sep 25, 2013 2:01 pm[/url]":vct5co0u]
Gentlemen please listen up,... IF you use the tap up by the thermostat, you will NOT(get an even flow of HEAT) or any heat at all!! Please don't use that set up ( my first attempt to heat but you may use the tap on the back of the cross over main tube only!! And you need to tap for another outlet down by the water pump which WILLgive you much better flow and Heat!!! This way gives enough heat!!! Ask me how I know !!!! Hope I caught this in time!!! :rocks: Bob[url=https://www.classicgoldwings.com/forum/viewtopic.php?p=97392#p97392:vct5co0u said:westgl » Tue Sep 24, 2013 9:50 am[/url]":vct5co0u]
I see there is a Vaccum port, that runs from one side of the Plenum to the other side.
That Vacuum port goes across the plenum width centered, that raised section in the plenum floor.
Drill & Tap that Vacuum port hole on each side of the plenum, and there is your Heated Plenum.
Drill & Tap the water line at the Fitting for the water tubes on top of the engine to provide heated water to the plenum.
Plenum Coolant Heat using a Ball valve shut off
Plenum Coolant Heat using a Ball valve shut off
Plenum Heat using Coolant from Water Tube adding Fittings
Plenum Heat using Coolant from Water Tube adding Fittings
- Joined
- Dec 3, 2009
- Messages
- 22,403
- Reaction score
- 238
- Location
- Van Nuys Ca.
- My Bike Models
- 1983 Interstate
2018 KLR 650
2018 BMW S1000 RR
- My Bike Logs forum link
- https://classicgoldwings.com/forums/dan-filipi.122/
Yes both of those brass fittings are on the pressure side of the pump.
A return side tap is needed to create a flow.
Return side is the other side of the pump, the suction side.
Either one of those pressure side taps should work as long as there's a return path to the pump.
I had a honey do list that pushed me out some.
Got a late start, but here is what I have so far.
I have the material cut today, and de-burred.
I made the mounting plate on the left side in the picture longer as that will actually be the right side sitting on the bike, and that longer side will allow me to mount brackets, that I may need.
Here I went and bought some narrow SS clamps, I do not like the OEM Clamps on the manifolds, cause you run out of adjustment, and it clamps very distorted like a Almond shape, this has a lot more adjustment and clamps round,
I like to tighten these style clamps with a 1/4" drive ratchet & socket I can get them tighter this way, and they are easier to adjust with a socket wrench.
Got a late start, but here is what I have so far.
I have the material cut today, and de-burred.
I made the mounting plate on the left side in the picture longer as that will actually be the right side sitting on the bike, and that longer side will allow me to mount brackets, that I may need.

Here I went and bought some narrow SS clamps, I do not like the OEM Clamps on the manifolds, cause you run out of adjustment, and it clamps very distorted like a Almond shape, this has a lot more adjustment and clamps round,
I like to tighten these style clamps with a 1/4" drive ratchet & socket I can get them tighter this way, and they are easier to adjust with a socket wrench.

yep the honey do is a hard task sometimes....most of the carb cutting is done with saw all not grinder I used the grinder some on the first one but fired it ,,,to messy ...ill post a pic after I finish rough cut with saw all ...after that its pretty much hand filed
wow things are going good with the projects around here on non stock carb projects :builder: :mrgreen:
wow things are going good with the projects around here on non stock carb projects :builder: :mrgreen:
I also played with the carbs a little.
I removed everything i could in the throttle bore.
I measured the center of the throttle bore it tapers down to 1" ID.
But with everything removed it looks like it could work very nice.
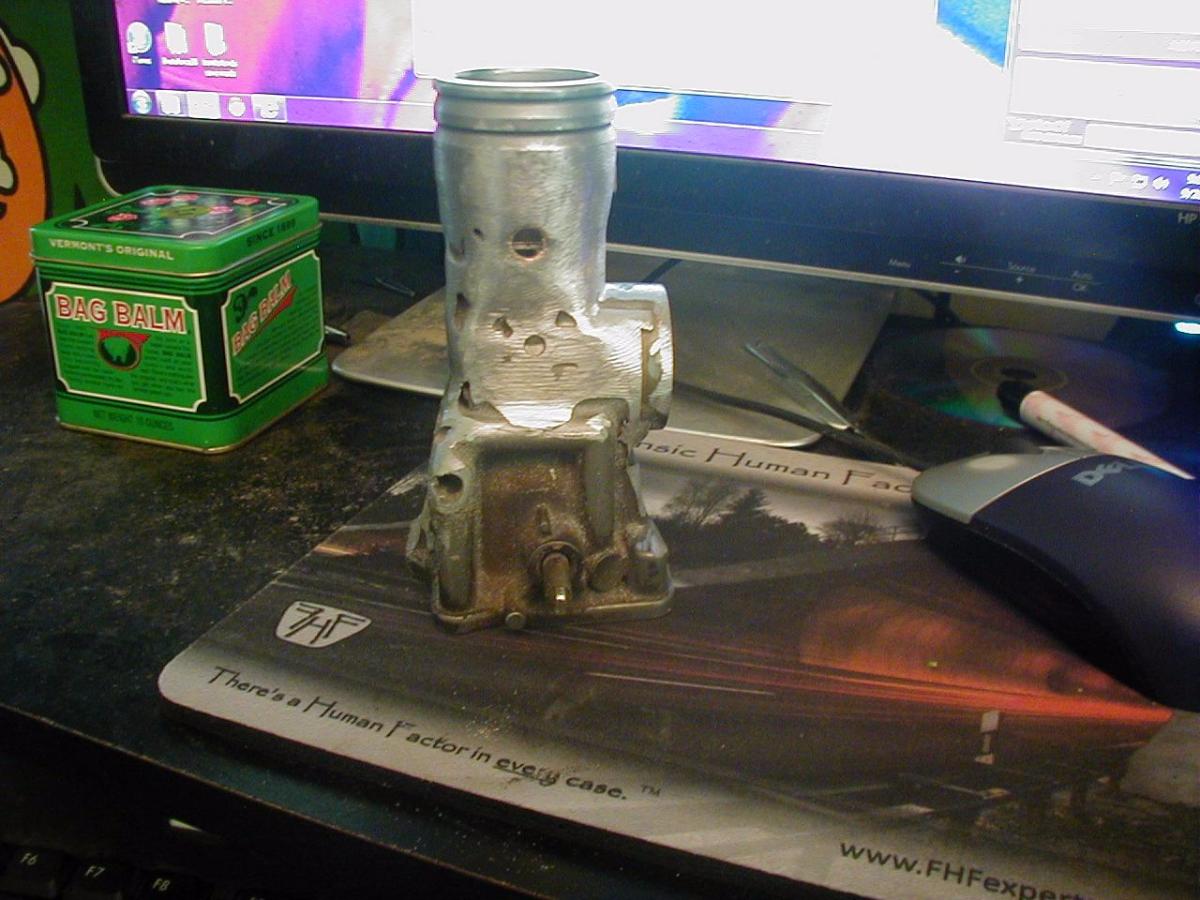
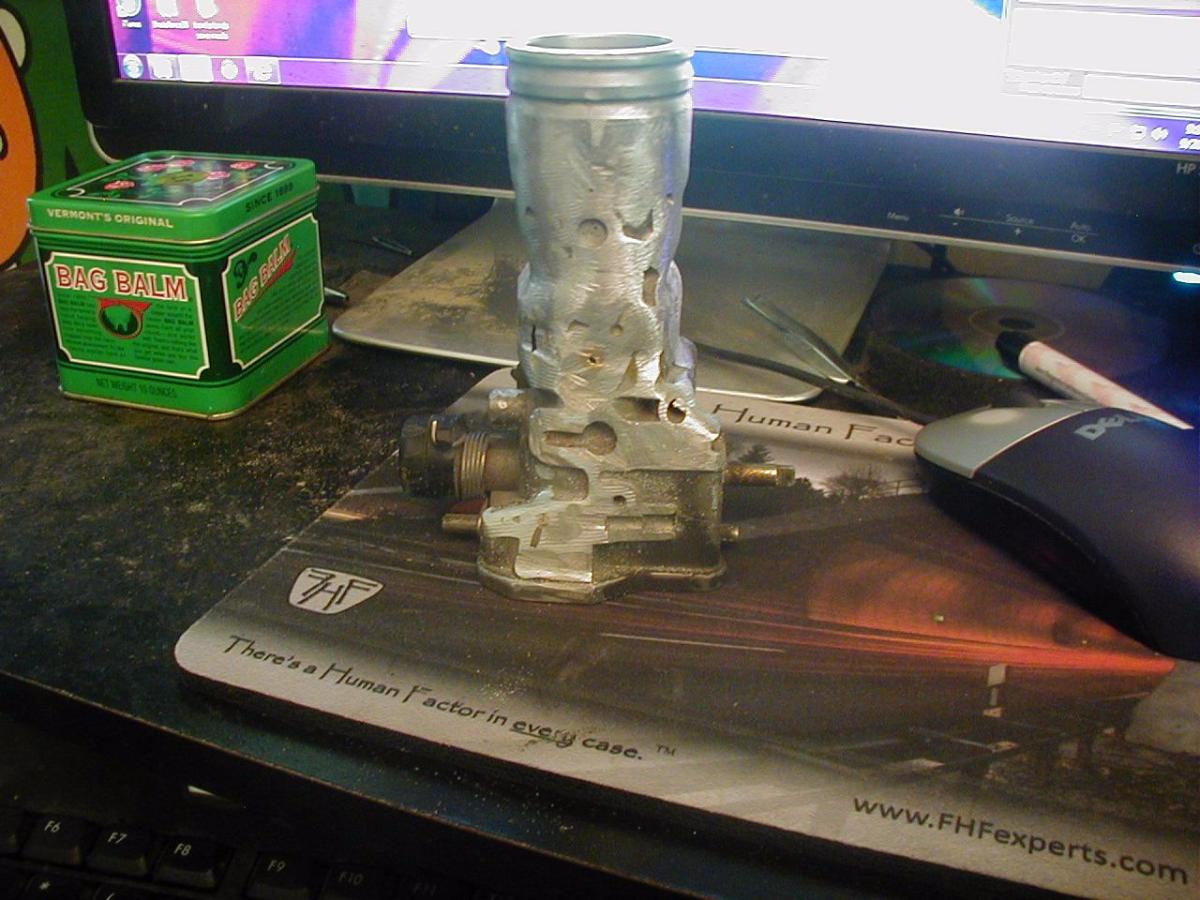
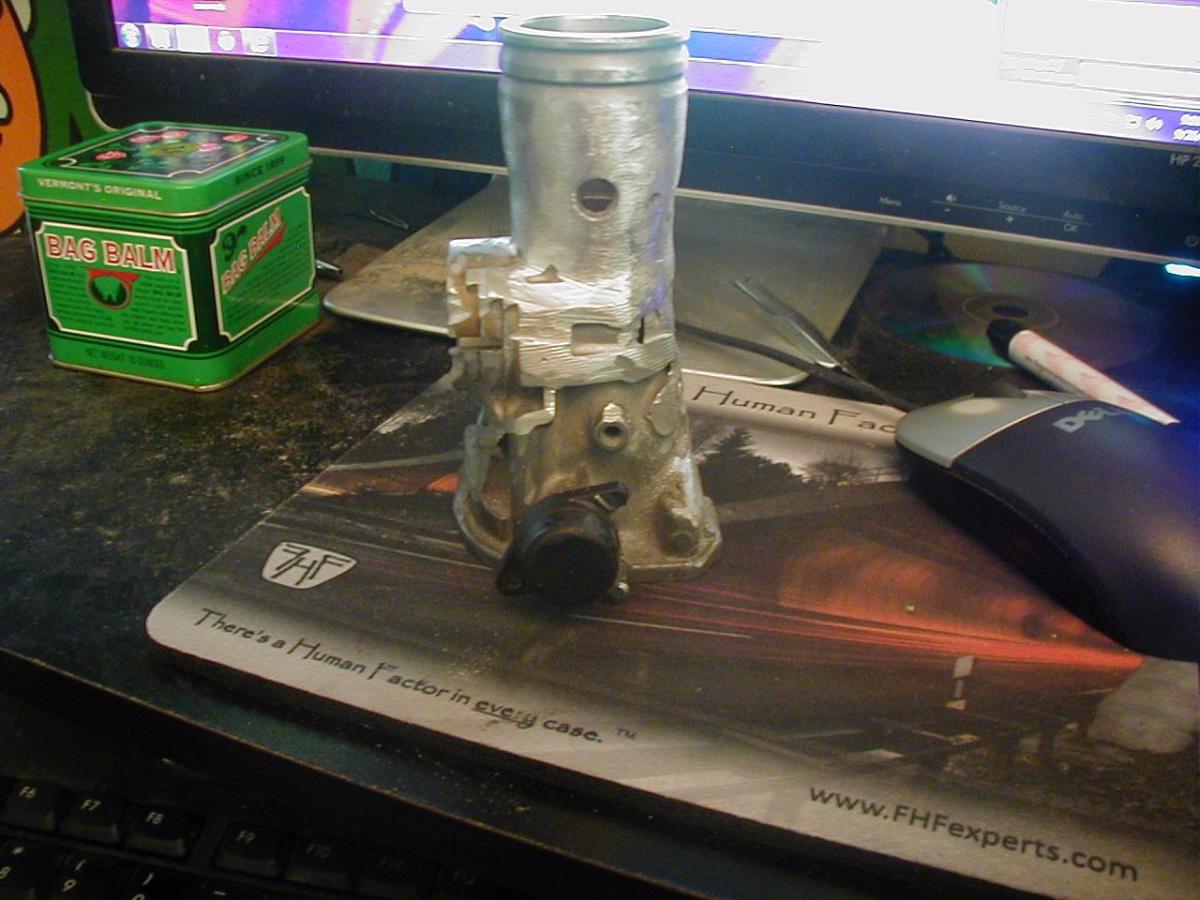
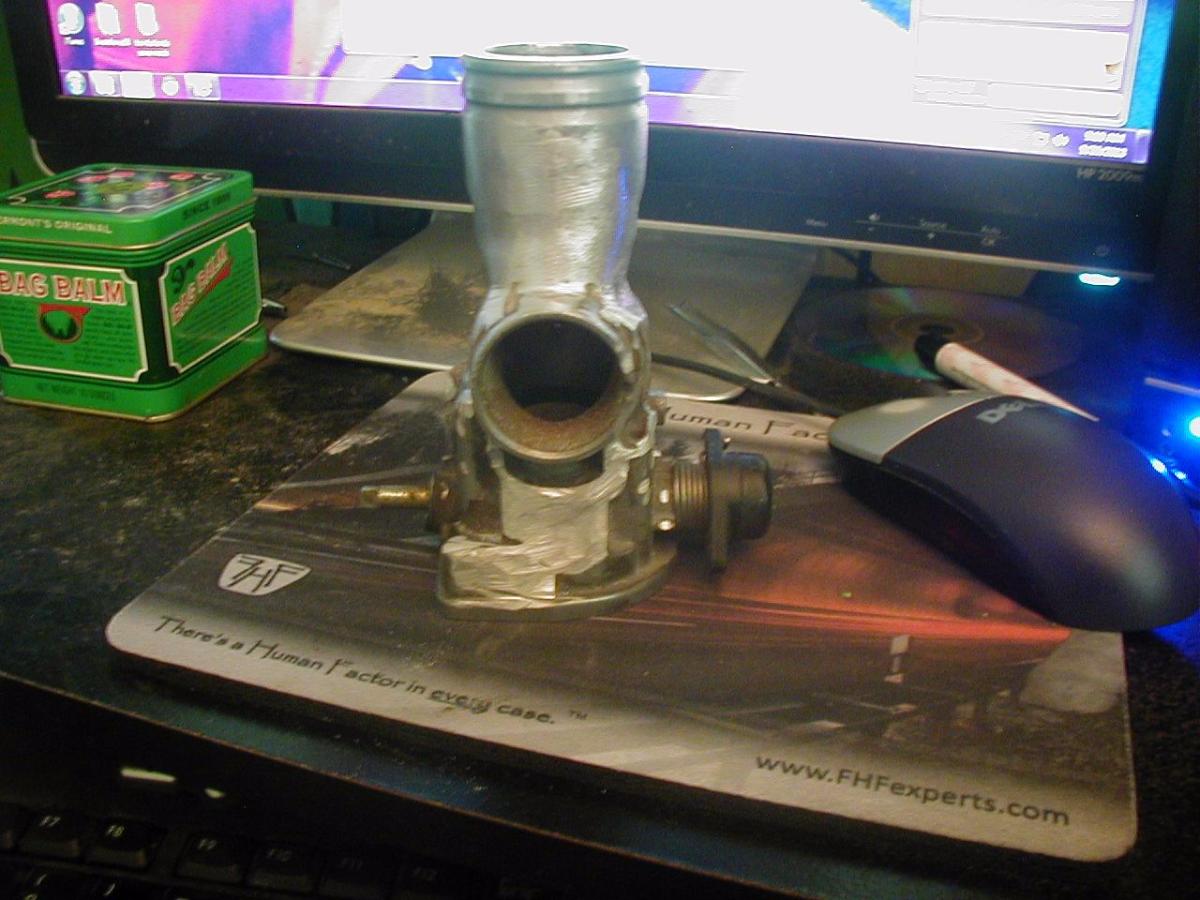
I also looked at heating the Carbs and the Plenum, using the existing Alum. tubes between the carbs, and the brass line going in I would just have to add another brass tube to the exit.
All Carb. bases & Plenum would be heated by coolant.
This picture shows the brass tube that would the inlet for coolant. You can see where it says OUT that is for the coolant out tube

Stock alum. tubes in between to provide coolant to carbs and Plenum

Here is a carb all jet holder under carb were removed and float stands also removed, all posts off of the side of the carb have also been removed
Carb bore with everything removed
Other side, carb bore everything removed some minor grinding.
I removed everything i could in the throttle bore.
I measured the center of the throttle bore it tapers down to 1" ID.
But with everything removed it looks like it could work very nice.
I also looked at heating the Carbs and the Plenum, using the existing Alum. tubes between the carbs, and the brass line going in I would just have to add another brass tube to the exit.
All Carb. bases & Plenum would be heated by coolant.
This picture shows the brass tube that would the inlet for coolant. You can see where it says OUT that is for the coolant out tube
Stock alum. tubes in between to provide coolant to carbs and Plenum
Here is a carb all jet holder under carb were removed and float stands also removed, all posts off of the side of the carb have also been removed

Carb bore with everything removed

Other side, carb bore everything removed some minor grinding.

yes it seems to have it all there ...im doing a lot of extra work ...it could be rather simple
If i do go with the GL1100 OEM carbs,
I may use the OEM carb Tops on the carbs like stock, after I seal everything up with high temp solder.
I figured, I can polish the carb tops, to dress it up some, they will only be on there for looks.
Now! about plumbing for a 25 h.p. shot of NOS
I may use the OEM carb Tops on the carbs like stock, after I seal everything up with high temp solder.
I figured, I can polish the carb tops, to dress it up some, they will only be on there for looks.
Now! about plumbing for a 25 h.p. shot of NOS
Guys the carbs that gave their life for this project had a jet broken off inside one of the jet holders.
Drilling out the jet may have damaged the Cod Catcher anyways
They were not a good set o Cod Catchers.
Today I feel like the Master of Disaster.
Drilling out the jet may have damaged the Cod Catcher anyways
They were not a good set o Cod Catchers.
Today I feel like the Master of Disaster.
badorderbob
Well-known member
No West,... between my G-daughter and wife to do stuff, it takes me away from my 2 wheeled Mistress :smilie_happy:!! I also wanted to share where I taped in down by the water pump,..... and your right Dan circulation was the key :good: !! Here's a pic where I tapped in,..and that's the spacer for a big block chevey :rant: puch,....when I did the Alt conversion but can be bought and do the same :thank_you: !!
Attachments

So the carbs Westgl is using are 25.4mm at the narrowest, pretty close to the 32/34 Joe has. What year carbs are you using, 75-77 were 32mm opening, 78-79 were 31mm I think?
1100s eric
My new tube runners are 35mm ID
If i have any problems, at all running 35mm the whole length of the runner I may stuff in a reducer, in the middle of the length of the tube, to speed up the charge through the tubes.
Maybe 1-1/2" long reducer, that reduces down the ID to 30mm, from 35mm.
It should be very easy.
If i have any problems, at all running 35mm the whole length of the runner I may stuff in a reducer, in the middle of the length of the tube, to speed up the charge through the tubes.
Maybe 1-1/2" long reducer, that reduces down the ID to 30mm, from 35mm.
It should be very easy.
im thinking if your going to choke it west ...do it as close to the carb as possible ..is what im thinkink is is best....it should be tapered ...or reamed on each end so theres no square edges and it sould be short as possible ...no more length than it takes to taper or it will diminish it effectiveness.....
well today I will get on the hand milling im doing it takes some time ....
my first air box mount for carb will be 5/8 ply wood ...LOL It will be easy to do and seal .. by the time im done with runners I want out of working with metal for awhile
still no carbs .. this is starting to look like ebay nightmare crap sheesh will see
:builder: :mrgreen:
pics
https://www.ebay.ca/itm/Water-Neck-Space ... 26&vxp=mtr[url=https://www.classicgoldwings.com/forum/viewtopic.php?p=97589#p97589:2xmsenyt said:badorderbob » Wed Sep 25, 2013 7:17 pm[/url]":2xmsenyt]
No West,... between my G-daughter and wife to do stuff, it takes me away from my 2 wheeled Mistress :smilie_happy:!! I also wanted to share where I taped in down by the water pump,..... and your right Dan circulation was the key :good: !! Here's a pic where I tapped in,..and that's the spacer for a big block chevey :rant: puch,....when I did the Alt conversion but can be bought and do the same :thank_you: !!

https://www.ebay.ca/itm/Moroso-63610-Spa ... fc&vxp=mtr
Moroso 63610 Spacer Kit Water Pump BBC
Water Pump Spacer Kit
Converts PN[63520] To Long Design
L-1 9/16 in.
Incl. Heat Treated Bolts And Gaskets
Converts Short Water Pumps To Longer
Includes Special Heat Treated Bolts/Gaskets

my 2c is this thread should stick to k.i.s.s.
adding the carb work could be another thread maybe titled
Single Carb Conversion: Adapt the stock plenum + adapting the carb bodies
more spacers
https://www.ebay.ca/sch/i.html?_trksid=p ... &_from=R40
adding the carb work could be another thread maybe titled
Single Carb Conversion: Adapt the stock plenum + adapting the carb bodies
more spacers
https://www.ebay.ca/sch/i.html?_trksid=p ... &_from=R40
[url=https://www.classicgoldwings.com/forum/viewtopic.php?p=97226#p97226:1pln7dan said:westgl » Mon Sep 23, 2013 12:20 pm[/url]":1pln7dan]
OK guys
I have been reluctant to bring this one up.
But it should be discussed.
You could use what you already have, instead buy the VW manifold.
Put at least some of the Cod Catcher to use.
Use the OEM GL1100 Plenum only.
The GL1100 plenum, is still fairly small, already has the Runner offset done, just a matter of connecting some straight runners to it.
Some 1/4" alum. plate across the left side cyl. bank covering the runners, holes cut toward the lower part of the runner exit, Any size you want, as long as it is 1-3/8"id. coming out of the plenum, then another plate, mounted to the Right bank, doing the same.
Hole saw to open plenum runners in new plate.
I may build this too, as i could do this fairly quickly, It would be very easy, and straight runners, No bends, could be alum. or steel, alum. can be High Temp silver soldered with a propane torch. easier & cheaper than welding
Alum. plate mounted to the top, w/ bolts (bolt heads chopped off, or all thread, I like grade 8 bolts) threaded into plate carb placement.
sheesh lots of work ...but I have time and this tool is costless :builder: :mrgreen: